Learning how to do outpainting to expand an AI image opens up a whole category of creative possibilities: turning square generations into cinematic panoramas, extending portraits into full scenes, adapting images to any aspect ratio, and building immersive wide-format art from modest starting images. Where inpainting fixes what’s inside the frame, outpainting imagines what’s beyond it — and modern tools do this remarkably well.
What Outpainting Is
Outpainting extends an image beyond its original boundaries: you define new canvas area around (or on one side of) your image, and the AI generates content filling that space, matching the original’s style, lighting, perspective, and subject matter. A square portrait becomes a 16:9 scene; a landscape gains sky above and foreground below; a character gets a world around them.
The technology is closely related to inpainting (our guide: inpainting guide) — both generate new pixels guided by existing context. Outpainting just applies it outward instead of inward.
How to Do Outpainting to Expand an AI Image: The Workflow
Step 1: Start with a strong source image
Outpainting amplifies your source — its style, quality, and compositional logic. A great source expands beautifully; a mediocre one expands its mediocrity. Ensure the source is final-quality before expanding: fix flaws with inpainting first, confirm the style, and verify the core composition works.
Step 2: Plan the expansion
Decide what you’re building toward:
- Aspect ratio conversion: square → 16:9 for video thumbnails, portrait → landscape for banners. The most common use case.
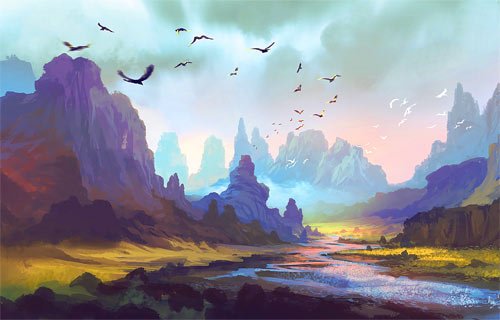
- Panoramic extension: expanding horizontally for immersive wide scenes — landscapes, cityscapes, battle scenes.
- Scene completion: your subject is great but floating in a tight crop; expand to give them an environment.
- Storytelling sequences: expanding one image in stages to reveal more of a world — effective for comics and storyboards.
Step 3: Expand in stages, not all at once
This is the key technique most beginners miss. Don’t expand 1024px to 4096px in one jump — the AI loses coherence over large new areas. Instead, expand incrementally: add 256–512px per side, review, then expand again. Each stage gives the AI fresh context from the previous expansion, maintaining consistency. Three controlled expansions beat one wild one every time.
Step 4: Guide with prompts
Describe what should appear in the new areas: “expanding to show more of the misty forest, tall pine trees fading into fog, same moody lighting.” Reference the existing image explicitly: “matching the existing scene’s style and lighting.” Without guidance, the AI guesses — sometimes brilliantly, often generically. Direction produces better results than hope.
Step 5: Blend and refine
Check the seams where original meets expansion: lighting consistency, perspective continuity, style match. Minor inpainting passes along the boundary fix most issues. Watch for the classic outpainting tells: repeating patterns (the AI cloning elements), horizon lines that don’t align, and lighting that shifts subtly across the boundary.
Outpainting in Different Tools
- Stable Diffusion WebUI: most control — canvas expansion with full prompt and settings control, staged expansion workflows. The professional choice.
- DALL-E: intuitive outpainting in the editor — upload, expand canvas, prompt. Excellent for quick aspect-ratio conversions.
- Midjourney: zoom-out and pan features expand images directionally — simple and effective for moderate expansions.
- Photoshop Generative Expand: the designer’s choice — outpainting integrated with professional editing, with content-aware controls.
- Runway and video tools: some extend outpainting concepts to video frames — relevant for our video generation coverage.
Creative Applications
- Cinematic conversions: square character art → 21:9 movie-poster format. The dramatic widescreen look transforms presentation.
- Virtual environments: expand a single room image into a full explorable-feeling space for games and VR concepts.
- Before/after reveals: start tight on a detail, expand progressively to reveal context — compelling for storytelling and marketing.
- Print adaptation: fit generations to standard frame sizes (our print guide: upscaling for print) without cropping away important content.
- Seamless textures and backgrounds: expand patterns for website heroes, presentation backgrounds, and textile designs.
Avoiding Common Outpainting Pitfalls
- The infinite repetition trap: AI loves cloning elements across expanded areas — the same tree five times, repeated windows. Break it with varied prompts per expansion stage.
- Perspective drift: over large expansions, the AI’s sense of perspective can wander. Anchor with explicit perspective descriptions.
- Style dilution: each expansion stage slightly dilutes the original’s distinctive style. Reference the original explicitly in every stage’s prompt.
- Resolution mismatch: expanded areas sometimes render softer than the original. Plan a final unified upscale pass over the complete image.
- Overexpansion: expanding a 1024px image to 8000px wide produces vast areas of AI guesswork. Know when the source material is exhausted.
For more background, see Wikipedia’s Stable Diffusion article.
The Takeaway
Outpainting turns every AI image into a starting point rather than a finished product: expand in stages, guide each stage with specific prompts, watch the seams, and plan toward your target format from the beginning. Combined with inpainting for fixes, it gives you complete control over the frame — what AI imagines inside it and what lies beyond it. The canvas is no longer a constraint; it’s a suggestion.